Smart Electronic Medical Records
Selected Reports
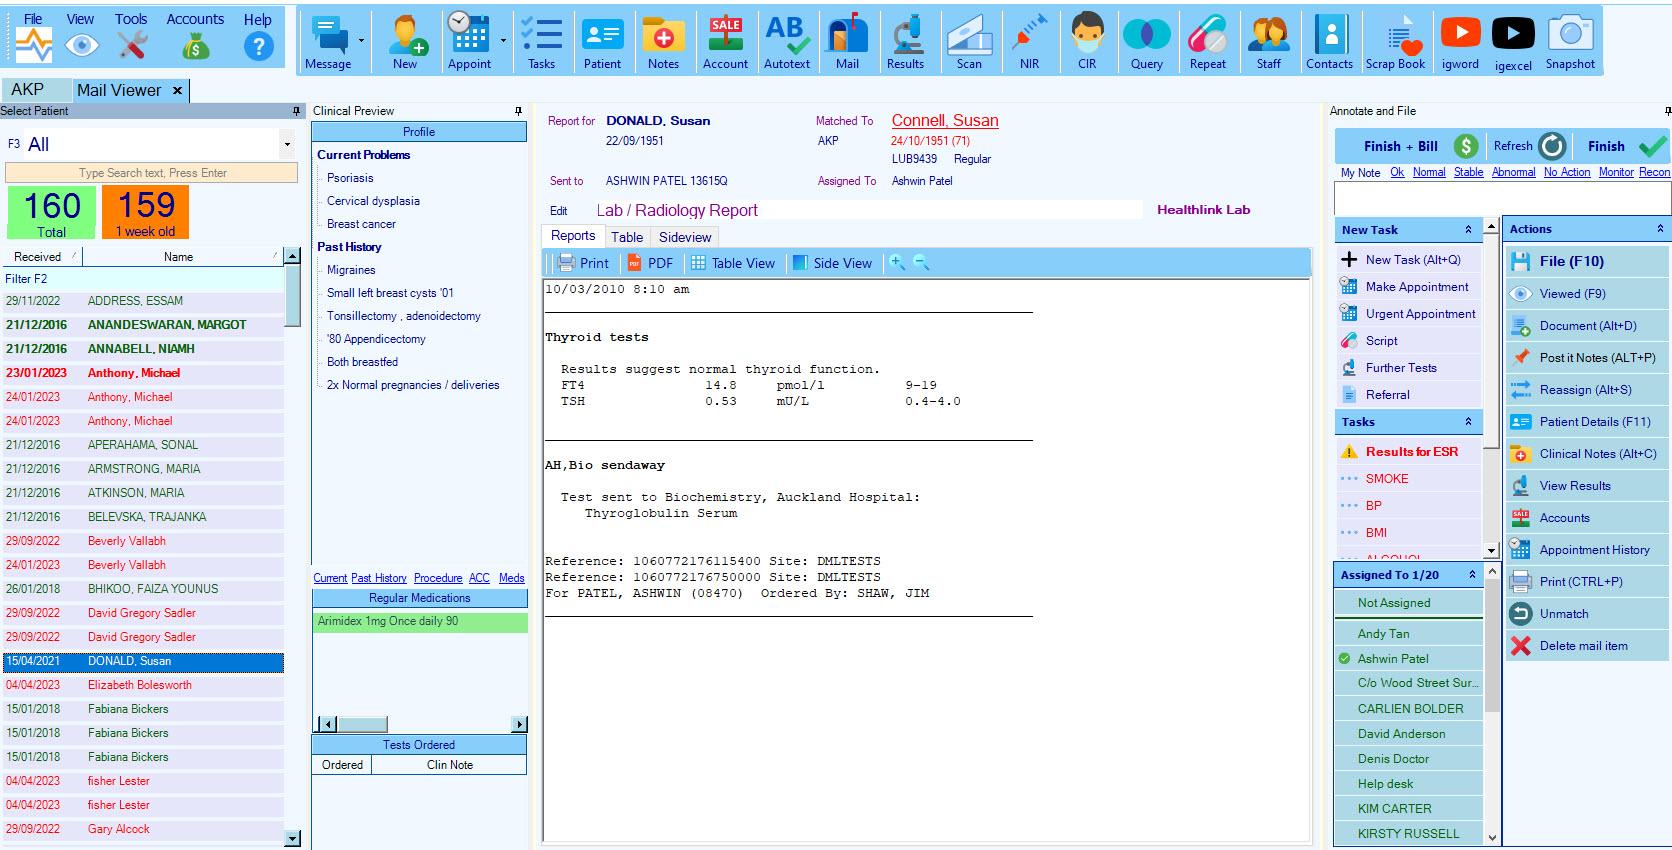
Finding reports for specific patients
A list of reports is displayed on the left.
- Click on a patient in the list
- Type part of the patient’s name in the filter row above the list [F2]
– Unmatched mail items are shown with a yellow background.
– RSD (referral, status and discharge) mail is in purple text.
– Labs are in blue text. Labs with abnormal flags are red.
– Scanned letters are in green text.
– NIR messages are in purple
Filter by the type of mail
Select from the dropdown list at the top left. [F3]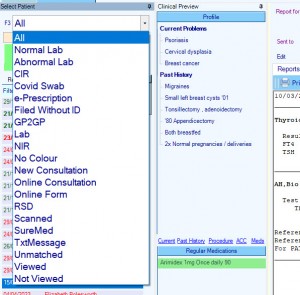
To find mail items containing specific text
Type that text into the Filter box and press [Enter]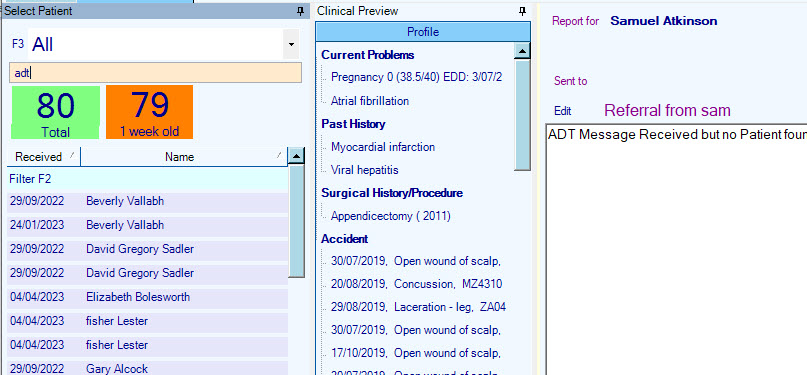
Actions
Annotate the results (My Note)
- Enter any comments you wish to make about the result in the field at the top right of the screen before you file the result. These will appear in the Clinical Notes and results table.
- There are links for quick entries of common terms.
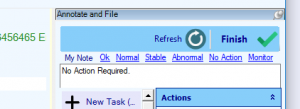
File the mail item
- Once you have finished with the mail item, Press [File] in the Actions menu.
- This marks the mail as viewed and records any comments added.
- The mail item has a strikethrough in the patient list and will not reappear when the mail screen is reopened.
Match Patient
If the mail has not been matched to a patient, Click on [Match] then identify the patient.
If you cannot match the patient and do not expect this patient to register in the near future, you can File Without Id
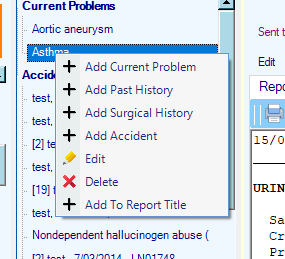
Update the Problem list or regular medications
Right-click in the problem list , select from the menu
Create a task for yourself or a staff member
- Select a preset Task (Make Appointment, Urgent Appointment, Script. Further tests or Referral)
- Click on New Task to create a customised task
Mark as viewed but do not file yet
- Click on Viewed, the item will appear bold in the patient list.
- Click on Viewed again to change the status back or File when ready.
Create a document to print or email to the patient
- Click on Document from the actions list
- Select your document template.
- Update the document if necessary before selecting Print or Email
- A copy of this document is saved in the patient’s record
Send your patient a txt message
- Click on Txt Message from the actions list (this is present if the patient has a mobile number)
- Select your txt document template.
- Update the document if necessary before selecting Send Txt
- A copy of this document is saved in the patient’s record
Remind me of a planned action next time I see the patient
- Click on Post-It Note from the actions list.
- Write a note.
- This note will appear on opening the clinical notes.
Reassign to another staff member
- Click on [Reassign] to assign this item of mail to a different practitioner.
Patient Details
- Open the patient details screen to look up the phone numbers, address or other details
Clinical Notes
- Open the clinical notes r this patient
Accounts
- Open the patient’s accounts screen
Appointment History
- Check past and upcoming appointments for this patient