Smart Electronic Medical Records
INR (Anti-coagulation) Management Form:
This form is accessible from the View Menu The basic layout is based on the Task Management Screen
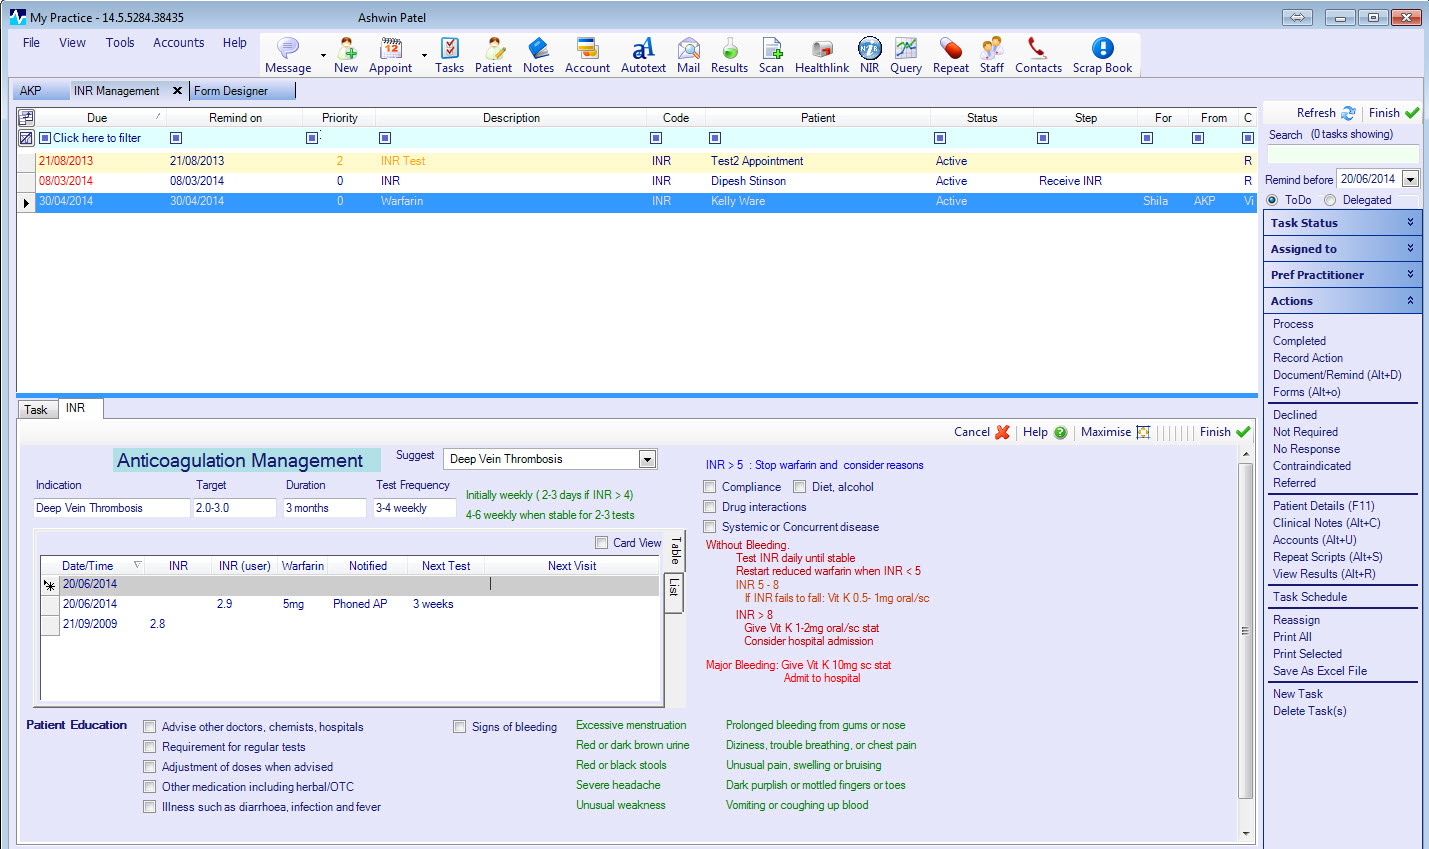
Tasks with the code ‘INR’ are displayed on this screen. A user defined form named INR must be present in the form designer. This will be displayed at the bottom of the screen for each patient. This form contains the patients reason for anti-coagulation (Indication), the expected duration of management and target level. A measurement table includes the Date , INR levels (User entered and self populated Lab Result) , the warfarin dose , the next test date and comments. It may also contain details of the patient notification.
- Add a patient to the INR management system.
In the Clinical notes,
- Add a task with the code ‘INR’ for each patient requiring INR management. ÃÂ Set the due date and Remind Date to the date of their next blood test.
- On the INR form record the Indication, duration and target range.
- Receive a lab result
On receipt of a lab result e.g. by fax or phone, Open the INR management form. Locate the patient (use the row filter on the patient column if necessary) Enter the INR value into the INR(user) column in the table . Press Finish on the form. On the task tab : Re-assign the task to the person responsible for determining the Warfarin dosage.
- Review the dose and set the next review date
Locate the patient (use the row filter on the patient column if necessary) Check the INR value against the target range and determine the appropriate dosage of warfarin. Enter this into the warfarin dose column. Decide on the appropriate review period and enter this in the next test column. Press Finish on the form. On the task tab: Re-assign the task to the person responsible for notifying the patient.
- Notify the patient and set the next review (due) date
Locate the patient (use the row filter on the patient column if necessary) Call, text or email the patient as appropriate then enter the details in the notification column. Include your initials if needed. Press Finish on the form. On the task tab: Set the next test date (as the due date) and Re-assign the task to the person responsible for checking results.