Find you way back…

Appointment Status

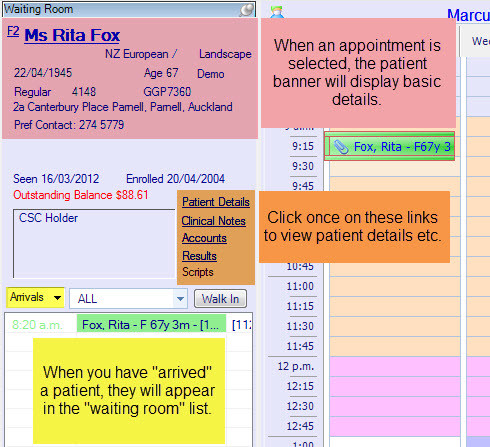
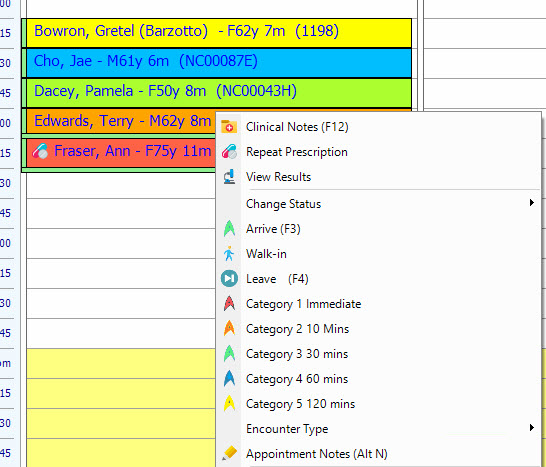
Track the movements of your patients through your practice by looking at their appointments status.

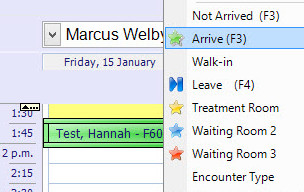
You can tell the status of any appointment by the background colour of each appointment slot. The status is also displayed in the balloon tool tips.

  • Not Arrived (white)
  • Arrived (green)
  • Notes Open (blue)
  • Seen (pink)
  • Left (gray)

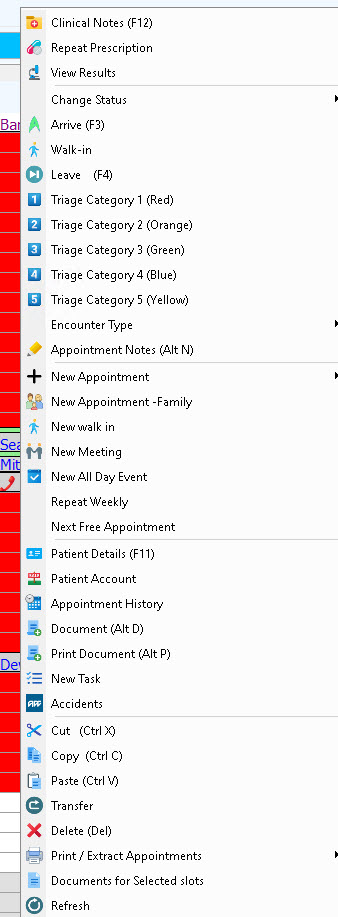
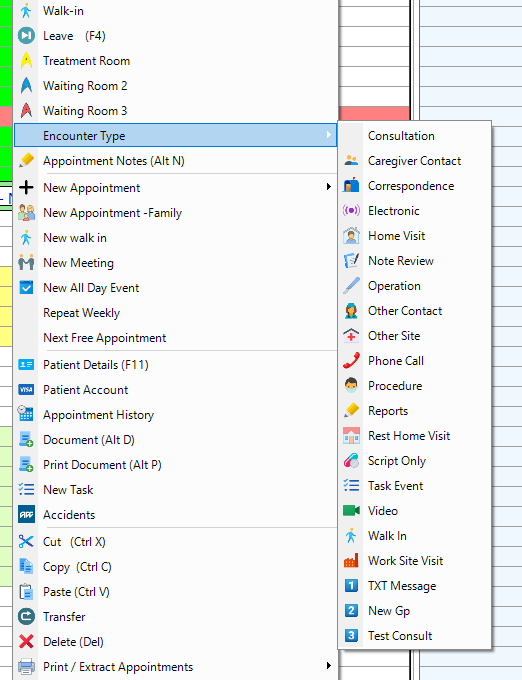
5 custom states can be set up in the system settings

These can represent location e.g.

  • Waiting room 1
  • Waiting room 2
  • Triage Room

These states can also be used to represent Triage categories

Triage Category 1-5

The labels for these states is set up in the System Settings. 

When a patient arrives for a booked appointment

  1. Right click on the patient’s appointment and select [Arrive] or press F3
  2. Review any alerts.
  • The appointment slow will then be coloured green
  • An appointment slip will print if enabled. (Document template with code APPTSLIP exists)


When a patient walks in without an appointment

  1. Right click on the practitioner’s appointment book and select [New Walk In].
  2. Search for the patient and press OK.

OR

  1. Go to the waiting room panel, and press [Walk In] (see picture below).
  2. Search for a patient and press [OK].
  • A new appointment will be made at the current time
  • The appointment slot will be coloured dark green
  • An appointment slip will print if enabled
  • Walk-in appointments will be ordered by time of arrival (from left to right).

Changing the encounter type (appointment type)

This defaults to Consultation.

  1. Right click on the appointment slot and open the Encounter Type menu.
  2. Select the appropriate type from the sub-menu.

n.b. This encounter type can also be changed within the clinical notes

Once chosen, different encounter types are indicated by icons within the time slot e.g. a Script Only encounter

Using the waiting room/patient panel

When an appointment is selected, the patient banner on the left will display some basic details. It will include if there is an outstanding balance or any other alerts.

The patient banner also includes links which means a patient’s notes or details can be opened without right-clicking on the appointment.

The Waiting Room will list the arrived patients, in the order they arrived.

Updating the patient’s location

If the patient is moved from the usual waiting area into an alternative area, right click on their appointment. Select the correct area from the list.

These locations can be set up in the system settings.


Also use for Triage categories

Patient being seen by a practitioner

If the practitioner has opened the notes, the colour of the slot will change to blue. This state will only change if the consultation is initiated near the appointment time and only by double-clicking on the appointment. (To preview the notes, select clinical notes from the right-click menu. )

On completion (closing the notes) the colour will change to pink.

When the patient is ready to leave

Right Click on the patient’ appointment and select [Leave] or [F4].
The Point of Sale screen will open. You can create their invoice and accept payments.

n.b. The appointment slot will be coloured grey.

Top