Find you way back…

Pay outstanding accounts

  1. Click on Account in the toolbar, select the patient or organisation 
  2. Select the Accounts Payment Tab
  3. Check the amount owing (To Pay) and enter the date, any comment  and the amount paid 

Payment by EFTPOS

  • Enter the amount paid into the EFTPOS box and press [Enter]

Payment by Cash

  • Collect the payment and enter the amount paid into the Cash box and press [Enter]

Payment by Cheque

  • Enter the amount paid into the Cheque box, the Bank. branch and  drawer (account name) into the appropriate boxes and press [Enter]

Payment by Credit Card

  • Collect the payment and enter the amount paid into the Credit box, select the card type from the dropdown list and press Enter

Payment by Direct debit or internet payment 

  • Enter the amount paid into the Direct box and press Enter

Payment by Cash

  • Collect the payment and enter the amount paid into the Cash box and press Enter

Repeat the above for payments by more than one method

The payments should appear in the Payments list below.

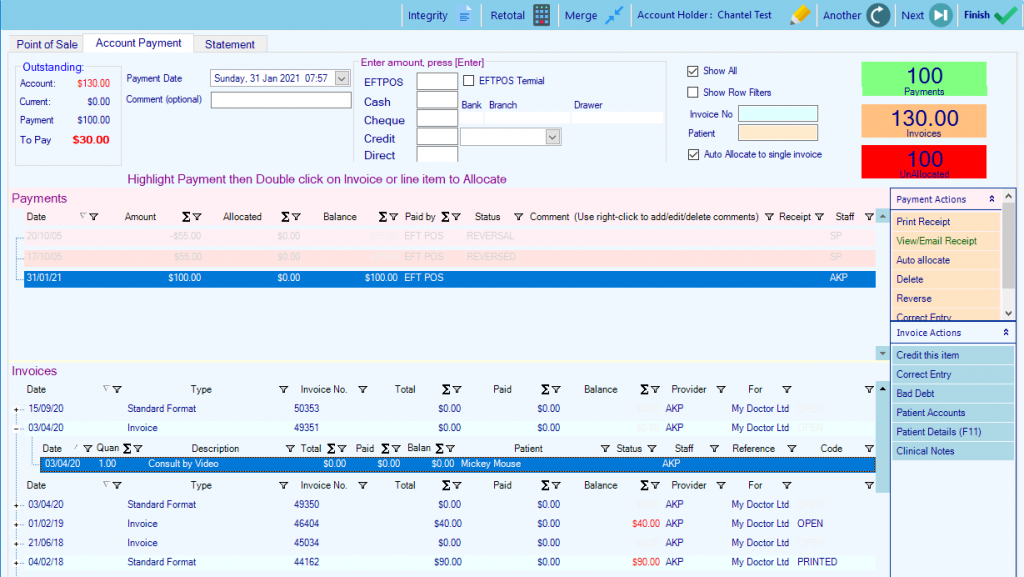
Allocate payments to invoices

Allocate to a single invoice

If there is a single invoice with an outstanding amount, payments will be allocated to this invoice (unless you have unticked this option).

Auto Allocate

  1. Click on the payment row
  2. Click on Autoallocate to allocate payments to the oldest outstanding invoices

Allocate to a specified Invoice

  1. Click on the payment row
  2. Double click on the invoice row

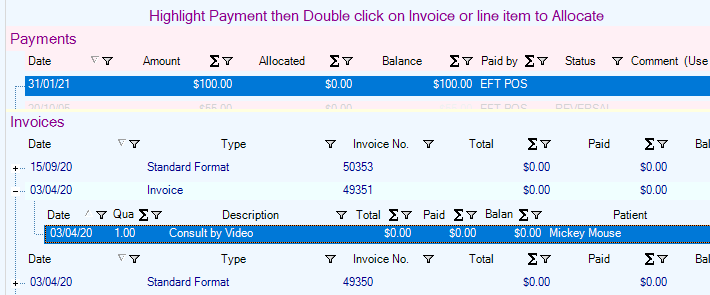
Allocate to a specified Invoice items

  1. Click on the + at the left of the invoice to view the invoice line items 
  2. Click on the payment row
  3. Double click on the invoice item row(s)

(Amounts allocated are up to the total value of the payment and up to the total amount outstanding on the invoices).

Receipts

Print Receipt

  1. Click on the payment
  2. Click on Print Receipt in payment actions

Email Receipt

  1. Click on the payment
  2. Click on View/Email Receipt in payment actions. (This option will be Green if an email address is present for the account holder)
  3. Click on the Email button
  4. Confirm or enter the email address when prompted
Top